Step four: measure the thickness of the frame and make a piece of wood that thickness. On this one that is .390" then cut to fit the frame like the one shown above. A small piece of wood can be cut to place between the main spring and this spacer to hold it in place. It's important that the spacer fit the frame well.
 IMG_0670
 by
Oliver Sudden, on Flickr
At this point glue and clamp the slabs to the spacer while on the frame being carful to have the square corner hard up to the receiver.
 IMG_0671
 by
Oliver Sudden, on Flickr
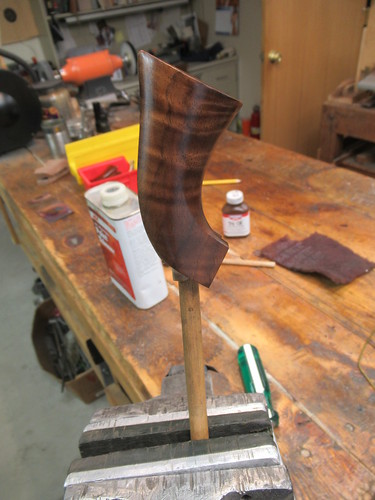
Once cured use a pencil to trace the frame to the wood and remove for rough shaping.
I like to add the serial number to the grip because Colt did, here you can see the pencil lines. Note how the grain appears to flow threw.
 IMG_0673
 by
Oliver Sudden, on Flickr
Back on the pistol I use electrical tape to protect the metal as I file down to size then scribe a line to the frame. remove them and sand down to the scribe mark.
 IMG_0674
 by
Oliver Sudden, on Flickr
At this point I put on a sealer coat of oil then refit them to the frame to look for spots that don't match like this, remove and trim till you're happy with the fit.
 IMG_0675
 by
Oliver Sudden, on Flickr
Now remove and finish. I see I didn't mention that the bottom of the grip has a 12 degree bevel like Colt did but you do them to suit yourself.
 IMG_0678
 by
Oliver Sudden, on Flickr
My way, maybe not the right way but what do you expect in two days.
 IMG_0679
 by
Oliver Sudden, on Flickr


 Home
Home Posts
Posts Recent Posts
 Help
Help Business Directory
 Calendar
 Advertising Rates
 Contact Us
 Login
Login Register
